Monday, June 26, 2017

Plane Father's Day Card

Hello and welcome to my blog!  Please enjoy this affiliate free space!  Today I'm going to show you the father's day cards that I made for my father and my father in law this year.
Once again I wanted to use some of my new Lawn Fawn stamp sets to make the father's day cards.  I've just been dying to break into them.  And what says father's day better than planes???  Nothing else I could think of!!!  So first I picked out some cardstock that would work well for sky and cut it to size using my Fiskars trimmer.
Then I got out my new stitched clouds background and ran it through my cuddlebug for the background of the sky.  I love this die!!!  It looks amazing!!!
I tried it with both the smooth side and the textured side of my cardstock and decided quickly that I liked the textured side best.
Next I got out my memento ink and my Lawn Fawn shammie I had my 4 year old wet the shammie (child labor) and got to work selecting my stamps, putting them on my acrylic block and stamping away.

Then for my banner.  I stamped Happy Father's Day and then I used the trick my friend Margret taught me.  You do not need a die to make a banner.  ever!!!  I'll teach you the trick she taught me!
Take the paper you stamped and make a cut in the middle toward the words.
Then cut at an angle toward the top of the cut you made.
Now cut from the other corner to the center again.
Repeat on the other side of the words and you have a banner.  See it's so easy!!!!  And paper crafting companies all over the world just lost money, well let's not kid ourselves we will spend it on something else I'm sure!  Just freeing up some money for something else.  Maybe these scissors for example.  if you don't have these yet you need them!  They are the Tim Holtz scissors and they cut like a dream.  No corner too small, I'm telling you!!!  I also have the large ones and love them too.  But I digress here are the banners. 
Next I colored the stamped images with my Zig real brush markers.  I love the markers.  They are pricey but worth  every penny!


I loaded everything up in my cuddlebug to cut.  I used A plate, the new magnetic plate, B plate and B plate.


Now I have all my pieces and am ready to put my card together.  I used my tombo liquid adhesive to attach my two small clouds to the background and my banner to my plane.  Then miracle tape to attach my banner to the backgtound.  Next I attached the plane and the large cloud to the background with pop dots.  When I was done attaching everything I attached it to my card base and I was done.


I hope you enjoyed this tutorial!  Come back soon for another card tutorial!!!  Below you will find the supply list and a plug for my favorite scrapbook store where you can find almost everything I used to make this card and many other great scrapbook and card making supplies you can't find at the big box stores.

Supply list
A2 Card base and envelope
American crafts cardstock white (smooth), light blue (textured)
Tombo liquid adhesive
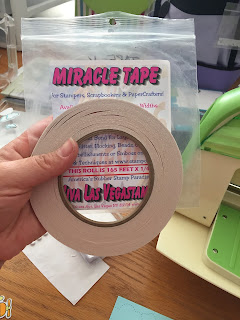
Miracle tape adhesive
Pop dots adhesive
Cuddlebug with A, B, B and magnetic plate
LawnFawn Plane and simple stamp and die set
Lawn Fawn shammie
Lawn Fawn stitched could backdrop
Acrylic stamping block
Tim holtz small sissors
Zig real brush markers
Fsikars paper trimmer

I am not an affiliate of my local scrapbook store but I love it!  It
gives me my sanity and I consider it my second home!  So I have to put
in a plug for my favorite scrapbook store!  As we all know many of our
local scrapbook stores are an endangered species.  So if you happen to
be in town or want to order online please do!  There are so many unique
products available.  I would truly appreciate you supporting my cropping
haven!

   
  https://www.scrappininthecity.com/


Sunday, June 25, 2017

Crabby Thank You

Welcome to my blog!  Please enjoy this affiliate free space!  Today I'm going to show you how to make an easy and cute thank you card.  It's very much like my Crabby get well card with a little different twist.  I actually designed this card first and adjusted it to make my crabby get well card.

Well, my youngest daughter turned four a few weeks ago, and I don't know how that happened!!!  But it did so I needed to make thank you cards for all her birthday guests.  We had a Moana themed party so  I needed something that would work with that.  Since coconuts are so important in that movie my mind immediately went to the palm trees die set that came out with the newest Lawn Fawn release.

So I picked a nice blue for the background and cut pieces to size for my cards.  Next I used my small stitched circle stackables.  I pulled out the biggest circle and used my cuddlebug to cut out half as many as I needed to make my islands.  Then I sliced them in half with my fiskars trimmer.

Next I pulled the clouds from plane and simple, stamped them with my memento ink onto American crafts cardstock, stamped thanks from the same set in the center of the largest cloud and used my shamie to wipe off my stamps.  
Then I used my Zig real brush markers to color in the edges of my clouds.  

After that the fun began!  I picked out cardstock colors for my crab, palm trees and coconuts.  I got out my cuddlebug plates and stacked A plate, B plate, magnetic plate, paper, dies and topped it with a B plate and ran it through.  Since I was doing several cards this helped use the cuddlebug most efficiently.


When that was done I was ready to assemble my card.  I started by using my tombo liquid adhesive to glue the tops of the palm trees to the bottoms.  Then I used miracle tape to attach my islands to the blue background.  When I was done with that I attached my palm trees and crabs with tombo liquid adhesive.  My new trick when attacking tings flat to my card is to leave parts of the object unattached to add dimension.    This was extra important today because my crabs were going to juggle....wait for it....coconuts!!!!!  RIGHT!!!!!!
 

So I attached pop dots to my coconuts taking care to make sure that the textured part of the coconuts was going to show.  Once attached, I added the coconuts to the card and bent my crab's claws up so it looked to be actively juggling the coconuts.  
Next I attached pop dots to the clouds and added them to the card.  And what I had was one of the cutest thank you cards I have ever made!!!  Thanks for coming to the blog today!  Hope you enjoyed this tutorial!  Below you will find a supply list and a plug for my favorite local scrapbook store.  You can find most of the supplies I used for this card and many other unique items that the big box stores don't carry.   

 
Supply List
A2 card bases and envelopes
Miracle tape
Tombo Aqua liquid glue
Pop dots
American Crafts cardstock white (smooth), dark brown, red, light green, dark green and dark blue.
Bazzil cardstock craft
Memento Ink
Acrylic stamp block
Cuddlebug with plates A, B, B, and magnetic plate
Fiskars trimmer

Lawn Fawn products:
Shammie
Palm tree die
Small stitched circle stackables
Plane and simple stamp and die set

I am not an affiliate of my local scrapbook store but I love it!  It
gives me my sanity and I consider it my second home!  So I have to put
in a plug for my favorite scrapbook store!  As we all know many of our
local scrapbook stores are an endangered species.  So if you happen to
be in town or want to order online please do!  There are so many unique
products available.  I would truly appreciate you supporting my cropping
haven!

   
  https://www.scrappininthecity.com/


Sunday, June 18, 2017

Crabby Get Well Soon

Hello and welcome back to my blog!  I know I have been gone for a couple of weeks!  My youngest daughter turned four and life had me very busy!  I've missed making cards so much!!!!  But thankfully I am back!  Today I'm going to show you how I made this "crabby" get well soon card.  I made this card for the get well soon Lawn Fawnatics Challenge!


So I wanted to do a unique get well card for this challenge as well as get into some of the new Lawn Fawn stamp sets and dies I had purchased, that I had not gotten to use yet.  I was inspired by a thank you card I had made for my daughter's birthday, which I will be blogging soon too.  I used the palm tree die set to make a cute island scene.  I just have to say the crab is so cute!!!!  I mean adorable!
I used the largest of the small stitched circle stackables from lawn fawn to create my Island.  I just cut one out of bazzil craft cardstock and then cut that in half with my trimmer.  My new trick when gluing down cardstock is to leave part of the image free to add dimension.  So in this scene I glued down the base of the palm trees and left the top parts free.  With the crab I glued down his body but left his claws free and even pointed them up so he could juggle the coconuts as seen below.

Next I used the plane and simple stamps and dies.  I used the clouds and put smiles on them too!  I colored them in with my Zig real brush markers (light blue) and used my cuddlebug to cut them out.
Next I used bannertastic and Sophie's sentiments to make my get well message.


Then when I was done with all of that I assembled my card and had a really cute get well card!  Hope you enjoyed this card tutorial.  Come back soon to see more!  Below you will find list of supplies and a plug for my favorite scrapbook store.  There you will be able to shop online, if you so choose, for most of the supplies I have used to make this card.

Supply List
A2 card bases and envelopes
Miracle tape
Tombo Aqua liquid glue
Pop dots
American Crafts cardstock white (smooth), dark brown, red, light green, dark green and dark blue.
Bazzil cardstock craft
Memento Ink
Acrylic stamp block
Cuddlebug with plates A, B, B, C, and magnetic plate\
Fiskars trimmer

Lawn Fawn products:
Shammie
Palm tree die
Small stitched circle stackables
Sophie's sentiments
Bannertastic stamp and die set
Plane and simple stamp and die set

I am not an affiliate of my local scrapbook store but I love it!  It
gives me my sanity and I consider it my second home!  So I have to put
in a plug for my favorite scrapbook store!  As we all know many of our
local scrapbook stores are an endangered species.  So if you happen to
be in town or want to order online please do!  There are so many unique
products available.  I would truly appreciate you supporting my cropping
haven!

   
  https://www.scrappininthecity.com/