Once again I wanted to use some of my new Lawn Fawn stamp sets to make the father's day cards. I've just been dying to break into them. And what says father's day better than planes??? Nothing else I could think of!!! So first I picked out some cardstock that would work well for sky and cut it to size using my Fiskars trimmer.
Then I got out my new stitched clouds background and ran it through my cuddlebug for the background of the sky. I love this die!!! It looks amazing!!!
I tried it with both the smooth side and the textured side of my cardstock and decided quickly that I liked the textured side best.
Next I got out my memento ink and my Lawn Fawn shammie I had my 4 year old wet the shammie (child labor) and got to work selecting my stamps, putting them on my acrylic block and stamping away.
Then for my banner. I stamped Happy Father's Day and then I used the trick my friend Margret taught me. You do not need a die to make a banner. ever!!! I'll teach you the trick she taught me!
Take the paper you stamped and make a cut in the middle toward the words.
Then cut at an angle toward the top of the cut you made.
Now cut from the other corner to the center again.
Repeat on the other side of the words and you have a banner. See it's so easy!!!! And paper crafting companies all over the world just lost money, well let's not kid ourselves we will spend it on something else I'm sure! Just freeing up some money for something else. Maybe these scissors for example. if you don't have these yet you need them! They are the Tim Holtz scissors and they cut like a dream. No corner too small, I'm telling you!!! I also have the large ones and love them too. But I digress here are the banners.
Next I colored the stamped images with my Zig real brush markers. I love the markers. They are pricey but worth every penny!
I loaded everything up in my cuddlebug to cut. I used A plate, the new magnetic plate, B plate and B plate.
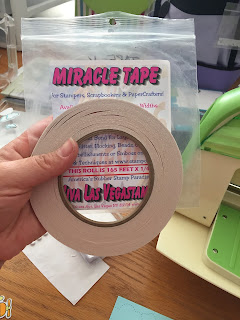
Now I have all my pieces and am ready to put my card together. I used my tombo liquid adhesive to attach my two small clouds to the background and my banner to my plane. Then miracle tape to attach my banner to the backgtound. Next I attached the plane and the large cloud to the background with pop dots. When I was done attaching everything I attached it to my card base and I was done.
I hope you enjoyed this tutorial! Come back soon for another card tutorial!!! Below you will find the supply list and a plug for my favorite scrapbook store where you can find almost everything I used to make this card and many other great scrapbook and card making supplies you can't find at the big box stores.
Supply list
A2 Card base and envelope
American crafts cardstock white (smooth), light blue (textured)
Tombo liquid adhesive
Miracle tape adhesive
Pop dots adhesive
Cuddlebug with A, B, B and magnetic plate
LawnFawn Plane and simple stamp and die set
Lawn Fawn shammie
Lawn Fawn stitched could backdrop
Acrylic stamping block
Tim holtz small sissors
Zig real brush markers
Fsikars paper trimmer
I am not an affiliate of my local scrapbook store but I love it! It
gives me my sanity and I consider it my second home! So I have to put
in a plug for my favorite scrapbook store! As we all know many of our
local scrapbook stores are an endangered species. So if you happen to
be in town or want to order online please do! There are so many unique
products available. I would truly appreciate you supporting my cropping
haven!


No comments:
Post a Comment