Welcome to my blog! Just a warning you will find NO affiliate links on my blog! Sweet freedom!!! Ok today I have made a card for the second lawn fawn challenge!

I had the idea two weeks ago but as we all know life can get in the way! But now I have it ready for the world to see! Hope you enjoy it! This card is called "Shoot for the Stars."
I started with the idea to do a card that is more unique than what I have seen done with the out of this world stamp set from Lawn Fawn. Let me tell you that is a real challenge because of all the amazing ideas from the Lawn Fawn design team and everything else I have seen on Pinterest. But I think I pulled unique off. And it is interactive to boot!
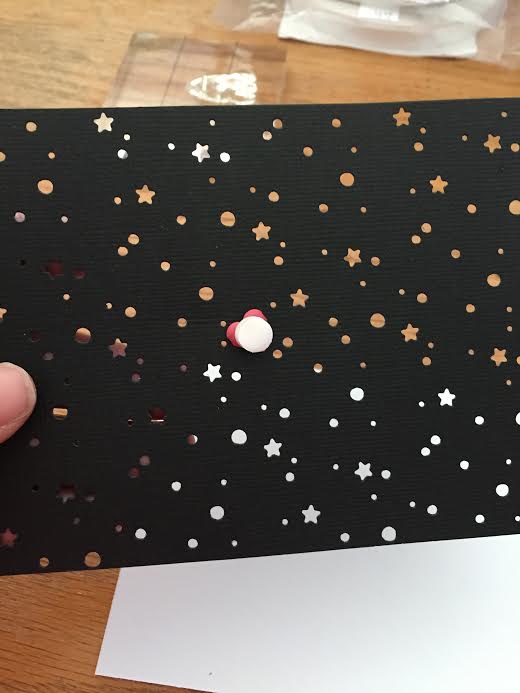
I picked some black cardstock since the backdrop is space. I use American Crafts cardstock because the cheaper stuff that the big box stores sell tear up my trimmer blades. And I used the white background for my sky because I really wanted my rocket to pop off my background. So I used my Fiskars trimmer to trim both pieces of cardstock to size. Then I used the snowy backdrop die from lawn fawn along with my cuttlebug to make my stars.
Next I started on my rocket. I used the rocket stamp from out of this world and put it onto my acrylic block. Then I used memento ink on it. I stamped it onto a scrap piece of cardstock.
Now let's talk about the new Lawn Fawn shammies!!! I LOVE them!!! I use it all the time with all my inks. As you can tell it has been well loved! Life changing I promise!!!
Than I colored my rocket using Zig brush markers.
Another new product I am in love with is the magnetic plate for the cuttlebug! it is amazing! and not too expensive either. Definitely an investment worth making. No more taping things down with washi tape and hoping it does not ruin your image.
The only difference is that you do not need the C plate when using the magnetic plate. You just use the A, magnetic, B, paper and die, and B plate.
With my rocket cut out I was ready to attach it to my card. First I attached the pop dot to the brad. Then I made a hole in the center of the sky. I attached my brad and placed foam tape where it could not be seen from the outside of the card.
I doubled up the foam tape so the brad would have plenty of clearance to spin in place. Then I attached my white piece of cardstock the back of the black piece of cardstock using Tombo liquid adhesive.
Next I attached what I had put together to the A2 card base. Now it was time to make my banner. I used bannertastic stamps and dies from lawn fawn as well as out of this world stamps for the words. Then cut it out with my cuttlebug.
I thought about using a color ink pad for the banner or coloring it but I really wanted my rocket to pop so I decided to leave it black and white. But I did use pop dots to pop it up. I cant resist pop dots!
And lastly I had to add some bling. So out came my yellow bling book. And here comes the stars! Just enough bling but not enough to take away from the rocket.
So there it is! A spinning rocket and all! Hope you enjoyed this tutorial. I will have a new blog post soon for you to enjoy in the next couple of weeks!
Supply list:
A2 card base
tombo adhesive
pop dots
Miracle tape adhesive
Yellow Bling book-Queen & Co
Brad
Piercer
Cuttlebug-A, B, B, C, magnetic plate
Snowy backdrop die
Bannertastic stamp and die set
Out of this world stamp and die set
Zig brush Markers
I am not an affiliate of my local scrapbook store but I love it! It
gives me my sanity and I consider it my second home! So I have to put
in a plug for my favorite scrapbook store! As we all know many of our
local scrapbook stores are an endangered species. So if you happen to
be in town or want to order online please do! There are so many unique
products available. I would truly appreciate you supporting my cropping
haven!