Welcome! Today I am going to show you a birthday card I designed recently. This card started with a card I saw on pinterest. Of course it ended up looking nothing like the card I first saw which is how it usually turns out. But I find that pinterest can be a great jumping off point when coming up with card inspiration. So the card I saw on pinterest had holes in it and that is about all I kept in my design. So I headed up to my craft space and pulled out some
watercolor paper and some
white cardstock to get started.
A very generous friend, thank you Rachelle, gave me some paper from a
watercolor pad she had bought. It turns out (surprise, surprise) if you buy a pad and cut up the paper it is the most frugal way to buy watercolor paper. And since I am on a very tight crafting budget I'm always looking for the way to save the most money possible.
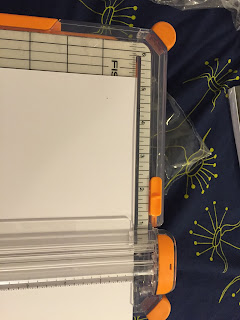
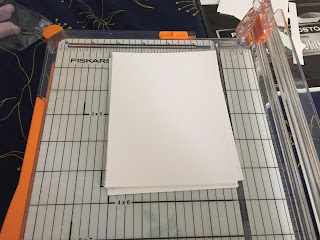
I got out my
Fiskars paper trimmer and started cutting my watercolor paper and cardstock to size. I like this trimmer because it not only has a really handy measurement arm but it has several common measurement sizes marked on it and it has a larger surface space so I can use it as a small work space which is nice at a crop or at home with my limited work space.
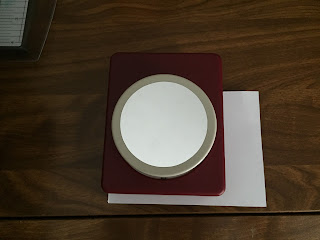
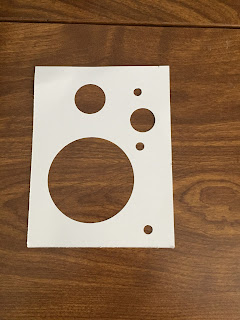
Next it was time to make my holes. I got out my
largest circle punch to start. I have said before in my other posts that I am not a fan of this kind of punch but it is what I have. it takes way to much force to punch the hole out with it so I would recommend another type of punch one with a lever or the kind that have handles that pull toward each other. The link I selected has a much better choice of large circle punch.
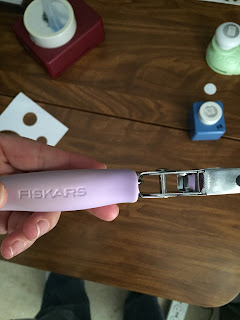
So after punching the first hole I got out my two smaller punches and punched out holes with those.
Now with these punches are fine because they are so small that there is not nearly as much force needed to punch. I picked these up at a yard sale at my local (and favorite) scrapbook store
Scrappin in the City.
Then I got out my
Fiskars hole punch and punched some more holes out.
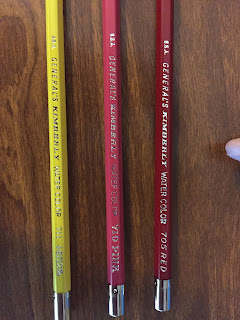
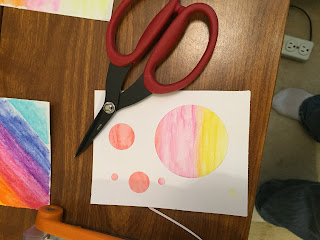
So now it was time to add the exciting part to the card the watercolor!!! I had picked up some
watercolor pencils and watercolor crayons at the yard sale at
Scrappin in the City and was excited to try them out.
I decided to start with my Watercolor pencils. Now these are not top of the line pencils, I cant afford fancy ones just yet. I got them out and started scribbling on my watercolor paper.
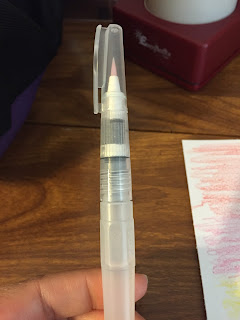
Then I got out my
Tim Holtz water pen. I squeezed it to activate the water and then began brushing it over my pencil marks and magically it came to life.
I liked the effect so I did a few others with different colors. It was fun!
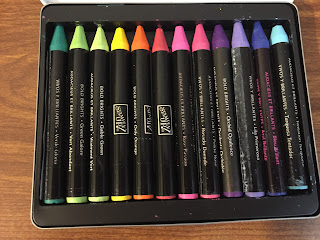
So while I was at it I decided to bust out my
watercolor crayons. I also found those at the yard sale at my local (and favorite) scrapbook store
Scrappin in the City.
The ones I got were stampin up but I know you have to go through a consultant for them so I have linked them to some at Joann Fabrics in case you want some right away. So these were amazing too!
They were a little grainier than the pencils due to the nature of crayons so they took a little more water to dissolve but the colors were extraordinary! Also the crayon color stayed on the brush tip a little bit longer and needed more wiping to remove than the pencil which only to one wipe to remove the color.
Here are some examples next to each other the one on the right is with crayons and the other two are with pencil.
Then I decided to get a little more creative. Now that I look at these a chevron pattern would be really cool to try next time! Ok so I laid them aside to dry while I worked on the next part of the card.
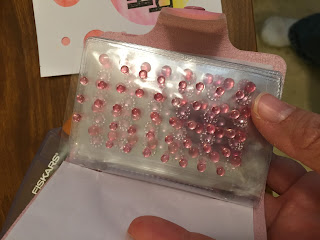
Next looked for some bling to add to the card. I got out my
bling books. When these came out naturally I had to buy all the colors available.
They are fun and I enjoy just being able to pull then out and add something fancy to a card or layout at a moments notice.
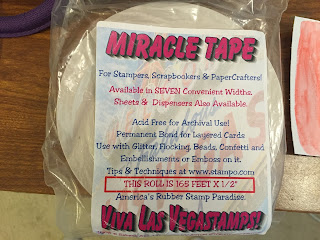
Ok now that I had my bling picked out I checked my watercolor paper and it was dry. It was time to attach the cardstock with the holes in it to the watercolor paper. So I got out my favorite adhesive
miracle tape from
Scrappin in the City.
I applied the miracle tape to back of the cardstock.
I puled it off and attached it to my watercolor paper.
Of course I didn't get it quite right so I used my
Tim Holtz scissors to cut off the part of the watercolor paper that was not overlapped by the cardstock.
Here comes the tricky part. I have a block stamp I really like but block stamps are hard to gauge where it will stamp. Here I am with ninety percent of my card done and it all hinges on how well I place this hard to place stamp. It might sound silly to you but I would be heartbroken and pretty ticked off if this stamp did not come out right and I had to throw this card (and all this effort) away. so here goes.
So this is another stampin up product I picked up at the yard sale at
Scrappin in the City last year. It came in a really cute set you can find
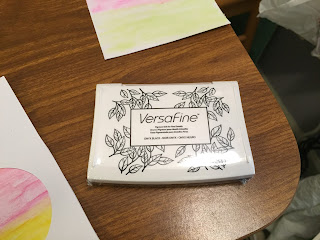
here on Amazon. It's the first time I have used it but I really like it. This is the ink I used
Versafine. It works well when working with Tim holtz inks and the water brush too.
And the moment of truth. Drum roll please!
YES!!!!! She shoots and she scores!!!!!! Oh thank goodness!
And lastly I need to add my bling!
I am now ready to add my card face to the
A2 card and I will be dome with my card!
Here it is all completed and ready to go. But I'm not happy with it. So I decided on my next try I decided to nix the bling and punch more holes with my hole punch. I mean just go crazy with it. So I did and this is how it turned out.
Love it!!!! I hope you do too! Check back soon for another card!
Supply list
I am not an affiliate of my local scrapbook store but I love it! It gives me my sanity and I consider it my second home! So I have to put in a plug for my favorite scrapbook store! As we all know many of our local scrapbook stores are an endangered species. So if you happen to be in town or want to order online please do! There are so many unique products available. I would truly appreciate you supporting my cropping haven!