Saturday, October 17, 2015

Baby (Boy) Shower Card


Welcome! Today I am showing a baby shower card I made last weekend for some dear friends who are getting ready to welcome a baby boy! So I knew I was making a shower card for a boy when I headed upstairs to my craft space but I had no ideas yet.

You are about to get a rare and possibly terrifying glimpse into how my mind works. I'm just warning you ahead of time this could get crazy. Fair warning!

So I started looking around my tiny space (a corner of a room, but no space is too small of you are determined to craft). I saw the new punch I picked up at the recent yard sale, at my favorite local scrapbook store Scrappin in the City. I decided I wanted to use it for the card. Mostly because I just wanted to use it!
http://www.anrdoezrs.net/click-7880084-10273743-1401800727000?url=http%3A%2F%2Fwww.joann.com%2Famerican-crafts-knock-outs-punch-triangle-banner-dear-lizzy-1.5%2F13604889.html&cjsku=13604889

http://www.anrdoezrs.net/click-7880084-10273743-1401800727000?url=http%3A%2F%2Fwww.joann.com%2Famerican-crafts-knock-outs-punch-triangle-banner-dear-lizzy-1.5%2F13604889.html&cjsku=13604889


I mean can you blame me check it out!!! As soon as I saw it I grabbed it and stuck it in my shopping bag! Anyway it turns out it is from stampin up. I've never tried any of their stuff before. But mostly I was thrilled to have a banner punch that was small enough to use on cards. I'm kind of obsessed with banners!!! Ok, so immediately I thought banner. I grabbed for my leftover scrap bag which I highly recommend you start one if you do not have one already (waste not want not and all). I found a yellow I liked and punched out some banners in yellow. Then I picked a lighter blue to go with it and then a dark blue too. At this point I'm thinking a banner across the card maybe with baby boy printed on it, but I hated the light blue and decided to scrap the banner across the card and put a small banner in the corner of the card.
http://www.dpbolvw.net/click-7880084-10273743-1401800727000?url=http%3A%2F%2Fwww.joann.com%2Fcardstock-85inx11in-200-pkg-world-tour-smooth%2F11266491.html&cjsku=11266491
So these are the colors I decided to use.  The cardstock I used was core'dinations world tour cardstock 8"X11".  I bought it at Joann fabrics and I have been using it forever it feels like. 

http://www.dpbolvw.net/click-7880084-10273743-1401800727000?url=http%3A%2F%2Fwww.joann.com%2Fcardstock-85inx11in-200-pkg-world-tour-smooth%2F11266491.html&cjsku=11266491
Then, suddenly, it came to me, a boat!  I'll make a boat.  So I grabbed my large circle punch.  I quickly decided to stick to the yellow and blue as my colors for the whole card.  I punched out a blue circle.
http://www.kqzyfj.com/click-7880084-10273743-1401800727000?url=http%3A%2F%2Fwww.joann.com%2Ffiskars-lever-punch-xxx-large---circle%2F2412922.html&cjsku=2412922

http://www.kqzyfj.com/click-7880084-10273743-1401800727000?url=http%3A%2F%2Fwww.joann.com%2Ffiskars-lever-punch-xxx-large---circle%2F2412922.html&cjsku=2412922
I picked up this punch at an outlet store.  I wouldn't  recommend it because it takes a tremendous amount of force to use the punch.  But any large circle punch will do.  I prefer the ones with the levers myself for ease of use.  Anyway back to the tutorial.  So I punched out my circle and the cut it in half with my Fiskars mini paper cutter because I don't trust myself to cut a straight line.
http://www.dpbolvw.net/click-7880084-10273743-1401800727000?url=http%3A%2F%2Fwww.joann.com%2Ffiskars-9-bypass-trimmer%2F8597379.html&cjsku=8597379

Then I used the same tool to cut a small piece of yellow from my cardstock for the mast of the ship.  Ok, so now I have all my pieces together.
http://www.dpbolvw.net/click-7880084-10273743-1401800727000?url=http%3A%2F%2Fwww.joann.com%2Ffiskars-9-bypass-trimmer%2F8597379.html&cjsku=8597379
So now it is time to glue.  My go to adhesive for these kind of projects is Mono Aqua Liquid Glue from my favorite local scrapbook store Scrappin in the City.
 
http://www.scrappininthecity.com/shop/c/p/MONO-AQUA-LIQUID-GLUE-x7803742.htm
I glued my mast and sail to my boat with the adhesive.


Then I took my boat and my banner and laid it out on the card face.  It definitely felt like it was missing something.  So I thought about it and I decided to add some watercolor waves.  I got out my Tim Holtz inks.  I suddenly realized that I was missing one of my tins and I panicked.  I started pulling everything out of the bag I brought to my last crop, totally freaking out that I would have to buy all 12 blue inks that had been in the missing tin.  And after spending what felt like forever looking for the tin, I realized that I had put it in my Christmas card tote.  Panic over!  Thank goodness!  So I got it out and resisted the very strong urge to kiss it.  Then I started looking at my blue ink to decide which one I would use.        

http://www.amazon.com/gp/product/B00M266W52/ref=as_li_tl?ie=UTF8&camp=1789&creative=9325&creativeASIN=B00M266W52&linkCode=as2&tag=papemavescard-20&linkId=W44FQHJDHJPUF7BI

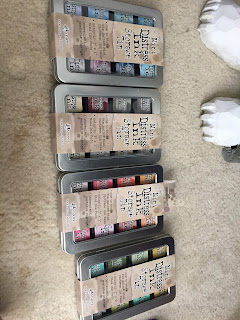
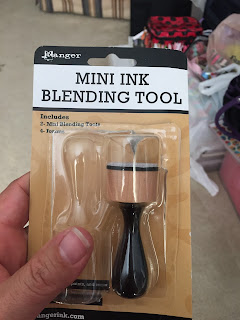
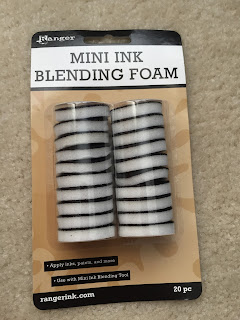
Ok, so here are my Ranger Mini Distress Ink Storage Tins .  If you decide to delve into the world of inks I strongly recommend the Tim Holtz distressed mini inks.  They are small and easy to carry with you and they are easy to use with water too.  I bought mine in the sets of four but they are available individually too.  And if you get the inks get the tins to carry them in too.  The tins are totally worth it because they fit in nice and snug so they are safe.  Lastly, when it is time to get your sponges you need to pick the Ranger mini ink blending tool.
   
http://www.anrdoezrs.net/click-7880084-10273743-1401800727000?url=http%3A%2F%2Fwww.joann.com%2Franger-blending-tool-1in--------%2F13874854.html&cjsku=13874854


http://www.tkqlhce.com/click-7880084-10273743-1401800727000?url=http%3A%2F%2Fwww.joann.com%2Franger-20-pkg-blending-foam-replacements-1in--%2F13874862.html&cjsku=13874862

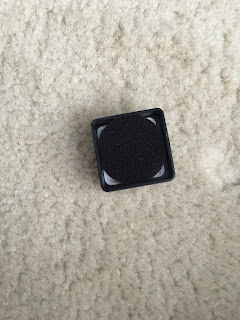
The reason you need to pick this one and not the rectangular one is because the foams fit right into the back of the ink pad!  So you have everything you need to use your inks right in the tin together.  Its so perfect!


Ok, back to the card.  I decided to use a mixture of peacock feathers and mermaid lagoon.
http://www.kqzyfj.com/click-7880084-10273743-1401800727000?url=http%3A%2F%2Fwww.joann.com%2Fpeacock--distress-mini-inks%2F14564975.html&cjsku=14564975
  I got out my Tim Holtz water pen to use with my inks.
http://www.amazon.com/gp/product/B007FXPGVS/ref=as_li_tl?ie=UTF8&camp=1789&creative=9325&creativeASIN=B007FXPGVS&linkCode=as2&tag=papemavescard-20&linkId=A7AXXCC6EYWE7LA6
Next, I got out my small stamping block and pressed both of my ink pads onto it to add my color.
http://www.kqzyfj.com/click-7880084-10273743-1401800727000?url=http%3A%2F%2Fwww.joann.com%2Facrylic-stamp-block-3inx4in%2F2137941.html&cjsku=2137941
Then I pushed in the sides of my water pen to add some water.


I put my pen into the inks and mixed them together to get the ink onto my pen.
Then I began to apply the mixture of the two colors to my card.  Making my waves.  I kept mixing and applying until I was happy.  I wished I could make more waves but the size of my card did not allow it.  It's funny how easy it can be to become a kid again with a little ink and water.   

Than I decided to make a sun.  For this I mixed the two inks below.
http://www.jdoqocy.com/click-7880084-10273743-1401800727000?url=http%3A%2F%2Fwww.joann.com%2Fwild-honey-distress-mini-inks%2F14565204.html&cjsku=14565204
Scattered straw and wild honey.  I followed the same process as before.

And here is what I had when I was done.  
http://www.amazon.com/gp/product/B007FXPGVS/ref=as_li_tl?ie=UTF8&camp=1789&creative=9325&creativeASIN=B007FXPGVS&linkCode=as2&tag=papemavescard-20&linkId=A7AXXCC6EYWE7LA6
I waited for my watercolor paper to dry and smoothed it out.  I grabbed my A2 card and realized that I had used it to wipe the excess ink off my water pen oops!  Well at least it will be covered by the watercolor paper I will be attaching.  
http://www.tkqlhce.com/click-7880084-10273743-1401800727000?url=http%3A%2F%2Fwww.joann.com%2Fcoredinations-card%252Fenvelopes--a2-white%253B-50-pack%2F13660816.html&cjsku=13660816

http://www.scrappininthecity.com/module/search_content.htm?form_version=2&showSearchResults=1&search_keyword=miracle+tape&image.x=0&image.y=0

Then I used miracle tape my favorite adhesive to attach the watercolor paper to my A2 card.

http://www.anrdoezrs.net/click-7880084-10273743-1401800727000?url=http%3A%2F%2Fwww.joann.com%2Fcoredinations-card%252Fenvelopes--a2-white%253B-50-pack%2F13660816.html&cjsku=13660816


I decided I wanted to pop both the boat and the banner off the card face.  So I put pop dots on the back of those and added them to the card.
http://www.dpbolvw.net/click-7880084-10273743-1401800727000?url=http%3A%2F%2Fwww.joann.com%2Fplad-mini-pop-dots%2F2187680.html&cjsku=2187680
 I added banner one flag at a time.

Then I was done!  Yay!!!

A cute little card for a cute little baby boy!  


Supply List:

I am not an affiliate of my local scrapbook store but I love it!  It gives me my sanity and I consider it my second home!  So I have to put in a plug for my favorite scrapbook store!  As we all know many of our local scrapbook stores are an endangered species.  So if you happen to be in town or want to order online please do!  There are so many unique products available.  I would truly appreciate you supporting my cropping haven!

http://www.scrappininthecity.com/

No comments:

Post a Comment